Building Multi Function Sheds For Small Gardens

Garden sheds provide storage for tools, lawnmowers, bags of fertilizer and other outdoor supplies. Smart shed designs may even offer space to plant or pot greenery.
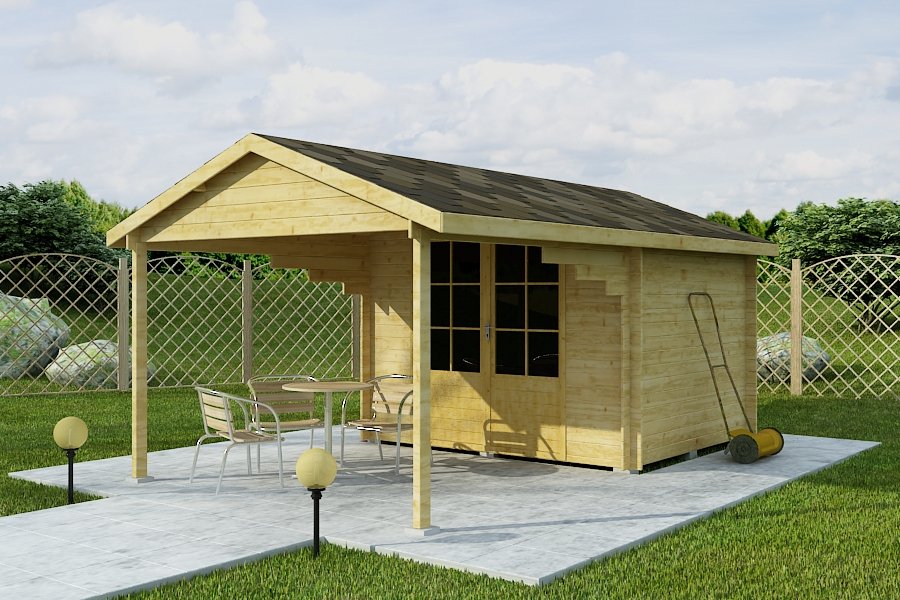
A Tudor style potting shed features a steep faux-slate roof and king post porch gable, and its red window frames and trim fit in perfectly with the cottage garden it shares space with.
Getting Started
Designing an ideal garden shed is key to making it feel like part of the home and landscape, providing extra storage, peaceful relaxation and workspace. Care must be taken when planning the shed’s design to reflect homeowner needs and preferences as well as using materials which are easy to keep clean.
Create a list of items to be stored in the shed to help determine its size. If tools will be the main storage purpose, a smaller design may suffice, while for lawn equipment or larger items a larger shed design might be required.
Check for Permit Requirements: Each community may have regulations concerning the size and placement of backyard sheds. Contacting your local government office that handles building codes and permits will help determine if your desired shed complies with these rules; otherwise you may need to make modifications so it meets all applicable guidelines.
Review Property Lines and Setbacks: Depending on where your shed will be built, setback requirements may limit how close it can be to homes or other structures – which could have an effect on both its cost and buildability.
Determine What Flooring Will Be Used: Choosing flooring materials that are easy to maintain and clean can be key when creating a multi function shed for small gardens. Tile, linoleum and vinyl are all durable solutions capable of withstanding foot traffic as well as spills.
Add Appealing Details: Whether you are an artist, hobbyist or home worker who uses their shed as their workspace, adding charming details can make the space more functional and enjoyable. Skylights and transom windows bring in natural light while double doors make equipment access easier.
An organized garden shed is an invaluable asset to any property and can increase its value significantly. This is particularly true in areas with limited space where homeowners store outdoor equipment and tools inside the shed to protect them from the elements.
Designing Your Shed
Consider what will go into your shed and the amount of space required before starting construction. Consider installing shelving or pegboards to keep tools and equipment organized, as well as how large items will enter and leave. If necessary, add ramps at its entrance so they can be wheeled in with ease.
Once you have an idea of the size and style of shed that meets your needs, the next step should be tackling the details. From windows, partition walls, storage solutions and lofts to exterior upgrades like siding, doors, shingles roof overhangs as well as interior features like flooring and shelving it’s time to decide on specific features for your shed.
Before you build, it is essential to check local regulations regarding shed construction. A building permit may be required and there may be setback requirements from your property line or structures. Furthermore, it’s wise to contact any HOA (homeowners association) as many have rules concerning shed appearance and materials; any violation could lead to fines or other consequences.
Once you know you can legally construct your shed, take an in-depth tour of your yard with an open mind. Look out for obstacles such as underground utility lines or sprinkler systems which could obstruct your plans; take note of any slopes which require extra site preparation costs; also note any slopes which might necessitate additional site work to build your shed.
Once you’ve identified any obstacles in your backyard, mark them on a map with stakes or string to help visualize how the shed’s footprint might look in your yard. Walk the marked area at various times of day to observe where shadows fall – this can help determine whether you should place it in sunlight or shade. It is also wise to contact any local utility companies that might be affected by your shed installation so that any underground utility lines affected are marked accordingly.
Building the Shed
Many sheds are used solely for storage purposes; however, multi-functional sheds can serve multiple functions and serve as offices, guest rooms, workshops or workshops. By investing in upgrades such as insulation, lighting and electrical upgrades as well as windows, shelving pegboards and cabinets; your shed can transform into two rooms in one.
Are You A Homeowner Thinking About Installing a Backyard Shed? A multi-purpose shed can significantly add value to your property while being easily adaptable as needs shift and change, providing much easier and cost-efficient options than building an entire new addition.
Preparing the site of your shed for construction is key to its success. Before beginning construction, ensure the ground is level and well-draining; using gravel foundation will reduce rainwater that collects on its sides, which may hasten wear-and-tear faster.
Once your site is prepared, select a plan that meets your individual requirements. If your shed will serve as a garden shed, look for designs featuring plenty of window space to let natural light in. If your purpose is office or workshop use instead, larger sizes that provide more storage for work tables and tool racks might be more appropriate.
Height should also be taken into account when designing a shed. To make sure it can meet all your storage needs, aim for 10- to 12-foot ceilings if possible – this will provide more wall space for hanging tools, shelves and cabinetry while making it feel larger. In terms of foundation design, avoid concrete blocks as these may eventually put uneven strain on its frame causing it to settle unevenly, leading to cracks appearing in walls, windows and doors over time – something difficult or impossible to repair once damage appears – instead opt for concrete slab if building on solid ground a solid surface surface!
Finishing the Shed
Finishing is what truly transforms a basic shed into an adaptable multi-use space. Be it an office, man cave, she shed, or any other type of shed imaginable – these upgrades not only enhance quality of life and property value; but can also bring greater peace of mind for owners.
Before starting to decorate your shed interior, it’s essential that you consider its intended use before beginning work on its interior finishes. This will enable you to select flooring, wall and ceiling materials accordingly – for instance if your shed will serve both storage and work purposes you might consider partitioning off sections so the space used for working or storing tools nearer the entrance is separate from more pleasing areas like a workspace or home office further back.
Additionally, consider whether or not your shed requires lighting, power outlets and/or water system installation. It would be prudent to seek professional help for this work in order to maximize success and avoid mistakes in installation of these systems.
Once the interior framing of your shed is complete, the next step should be installing insulation. Insulation provides year-round temperature regulation inside your shed for year-round working or living comfort – and its installation is cost effective and straightforward. Spray foam or fiberglass insulation options are both cost-effective options that can easily be fitted.
Once the insulation has been added, the walls and floors can be finished using materials of your choosing – carpet for an inviting feel or vinyl, which provides durability while being easy to maintain and clean up are two examples of materials you could choose to finish the walls and floors with. If electricity is required then installing a breaker box and wiring will need to be performed by an experienced electrician – another task best left up to them!
Upgrade the flooring by choosing more durable and visually appealing alternatives than plywood, such as linoleum, hardwood or laminate flooring. However, regardless of which option you go with it is crucial that the surface is prepared thoroughly prior to applying your finishing products in order to create an even coat and protect your shed from moisture damage.
Make the most of your outdoor shed entertaining space by creating the ideal party spot by furnishing it with a mini bar, comfy seating arrangements, and dining facilities. Choose materials that will be easy to maintain so it remains an entertaining space for years.